
In this tutorial, we will use a third-party certificate called Let’s Encrypt. Let’s Encrypt is a free, automated, and open certificate authority brought to you by the non-profit Internet Security Research Group.
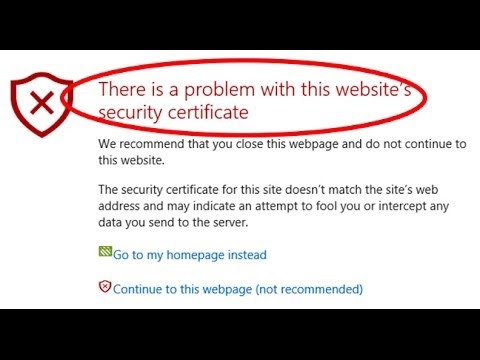
Let’s say you are running a Splunk server with a new self-signed certificate. The self-signed certificate is used to encrypt communication to and from the server. However, some annoying things may happen, such as every time you try to access your Splunk Instance via the web browser, a warning will show up:
This is because the web browser doesn’t trust the Splunk self-signed certificate. In order to avoid this warning, we can use a trusted third-party certificate instead.
Getting Started
Step 1 — Install Let’s Encrypt:
Installation instructions can be found at https://certbot.eff.org/lets-encrypt/centosrhel6-other.
The following commands will install the Let’s Encrypt (RedHat / CentOS examples):
wget https://dl.eff.org/certbot-autosudo mv certbot-auto /usr/local/bin/certbot-autosudo chown root /usr/local/bin/certbot-autosudo chmod 0755 /usr/local/bin/certbot-auto
Step 2 — Generate certificates and corresponding files:
Run these commands and verify results:
sudo /usr/local/bin/certbot-auto certonly –standalone -d your_domain_nameThen the followings files will be generated and found in /etc/letsencrypt/live/your_domain_name
- cert.pem
- chain.pem
- fullchain.pem
- privkey.pem
We should set up some permission rules so that the files can be readchmod 644 cert.pem chain.pem fullchain.pem privkey.pem
Step 3 — Place .pem files in a single folder
The purpose of this step is just to place the pem files under the Splunk folder so that they are easy found.
mkdir /opt/splunk/certs/cp /etc/letsencrypt/live/splunk.query.ai/cert.pem /etc/letsencrypt/live/splunk.query.ai/chain.pem /etc/letsencrypt/live/splunk.query.ai/fullchain.pem /etc/letsencrypt/live/splunk.query.ai/privkey.pem /opt/splunk/certs/
Step 4 — Add configurations in web.conf
The web.conf should be located in /opt/splunk/etc/system/local/web.conf.
Add these lines under setting stanza on web.conf:privKeyPath = /opt/splunk/splunk/certs/privkey.pemserverCert = /opt/splunk/splunk/certs/fullchain.pemRestart Splunk by executing /opt/splunk/bin/splunk restart
Open the Splunk UI URL in the web browser.
The web browser should show the certificate is valid.
Step 5 — Add configuration in server.conf
The server.conf should be located in /opt/splunk/etc/system/local/server.conf.
First, we need to create a new file named new_fullchain.pem under ‘/opt/splunk/splunk/certs/’ directoryThen we copy the content of fullchain.pem into new_fullchain.pemand copy the contents of privkey.pem pasting it in the middle of new_fullchain.pem
There should be three stanzas in new_fullchain.pem: certificate, private key, and certificate.
Add the following lines in server.conf
enableSplunkdSSL = true

serverCert = /opt/splunk/splunk/certs/new_fullchain.pem

sslRootCAPath = /opt/splunk/splunk/certs/chain.pem

Restart Splunk by executing

/opt/splunk/bin/splunk restart
Open your Splunk Server URL in the web browser.
The web browser should show the certificate is valid.
Thats its!
You will now be able to securely access your Splunk instance without that annoying certificate error. Happy Splunking!