

In this article, we are going through a complete example of how to use Angular and Angular Material to create a spreadsheet.

We are going to cover from how to create an angular project to how to delete a column or row and creating table cell tracker like Microsoft Office Excel. However, before I start, I would like to introduce myself.
I’m Mahmood H. Alnasser, a computer science senior student. I started working with Query.AI a few months ago. At Query.AI, we are committed to helping companies unlock the power of their
data, so they are empowered to lead with insight-driven strategy and decisions across the organization.
My first task assigned was to create a spreadsheet, and I would like to share my experience with everyone.
I picked Ron Swanson as a theme for my post because I will explain how to implement a spreadsheet with as little text as possible.

TABLE OF CONTENTS
In this post, we will cover the following topics:
- Create an Angular framework project.
- Setup Angular Material.
- Create Material Data Table.
- Delete a column and row functionalities.
- Create a column and row functionalities.
- Implement inline cell editing.
Create an Angular framework project.
You’ll need to have Nodejs and Angular. If you don’t already, take a moment now through the links provided. The rest of us will go to refill our coffee mugs. When you’re ready, run this command.

Now, you have your Angular project ready!

Run this command to run your project: http://localhost:4200/

Our project is empty, sad, and most important, there is no spreadsheet. Let change this fact. It’s time to add Angular material to your project.
Setup Angular Material
To add Angular Material to the project, You can use either the npm or yarn command-line tool to install packages.

Add Angular material using npm command-line tool.
We will only use mat-table component. If you’re not familiar with Mat-table component. I will recommend you to familiarize yourself with it, before going further more.
Let’s start writing some codes
1. Start with modifying app.module.ts
2. Use material icons by adding this line to your index.html
3. Create some data
4. Import necessary libraries to app.component.ts
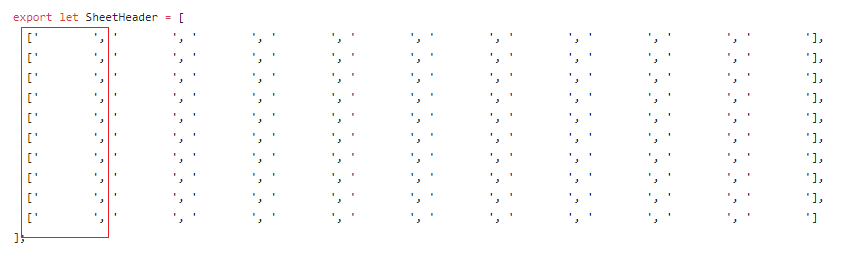
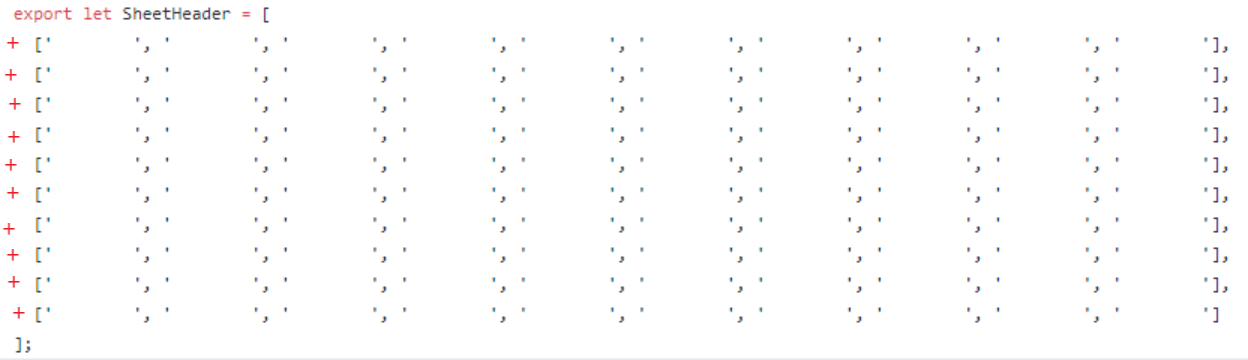
5. Define a variable for headers name and another one for dataSource
After this step you app.component.ts should look like this:
6. It’s time to write some HTML.
Start with deleting everything inside app.component.html, then type this down! Oh no, do not copy it… TYPE IT.
7. Add some styling.
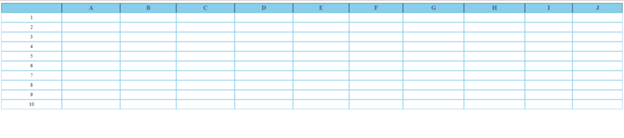
You should end up with something like this. It looks ugly but will do it!
Now, we will implement delete or add a row or a column functionality. I faced a hard time implementing this for the first time and I don’t want anyone else to suffer, too. So, let’s start.

Let’s start with implementing delete a column functionality.
To delete a header, we need to delete the specific header from the displayedColumns, delete all data related to this header and modify headers’ names. If we decide to delete the first header for example:

Delete and modify headers’ name
Delete all related data
I will start by adding buttons to every header and row:
The algorithm I developed to delete a header functionality:
If you implement this correctly, then your spreadsheet should look like this:
Now, let’s Implement add a row functionality:
We can add a row to the left or the right. I will only implement add a row to the left because:

To add a header we need to add a header to the left of the header we clicked on in displayedColumns, add a new cell to each header and modify headers’ names. If we decide to add a header to the left of the first header for example:

add a new header and modify headers names
add new cell
The algorithm I developed to add a header functionality:
If you implement this correctly, then your spreadsheet should look like this:

Now that we are completely done with header functionalities. It’s time to work with rows functionalities:

Let’s add a row:
To delete a row, we delete an entire row from our dataSource. for example, if we decide to delete the second row:
The algorithm I developed to delete a row functionality:
If you implement this correctly, then your spreadsheet should look like this:
Now, let’s Implement add a row functionality:
The algorithm I developed to delete a row functionality:
If you implement this correctly, then your spreadsheet should look like this:
Congrats! You finish 90 percent of the tutorial:

Time to implement Inline cell editing.
Will use an object to control which cell to switch to edit mode:
Start modifying the HTML:
Also, add the function switch to input:
If you implement this correctly, then your spreadsheet should look like this:

Now, The spreadsheet is complete! I will leave one assignment for you to do. You can use Hostlistener to implement Excel like a directly editable table with moving around.
Bye

Thanks to Ferdinand Ramos.
Did you enjoy this content? Follow our linkedin page!